So far we have covered the basic knowledge you must learn about the golf cart clutch. Now, it’s time to delve into the main process of removing the club car drive clutch.
Step 1: Gather Necessary Tools
Prior to beginning any technical operation, it’s important to have the appropriate tools. In the case of golf cart drive clutch replacement, however, you can’t even perform the first step without some specific tools. Check them below:
- A Clutch Puller- If you are working on your club car’s clutches in any way, you’ll have to be sure you don’t forget to pick a clutch puller on hand. This is because the clutches of golf remain in press-fitted condition.
- Air Gun- This is one type of hand-held screwdriver powered by a battery or electricity. It’s suitable and efficient at dealing with delicate and sensitive machine components.
- Rubber Hammer- It is used to loosen locked-up transmission and drive axle bolts and threads on a golf cart transmission and clutch.
Step 2: Identify Your Golf Cart
To remove your cart’s clutch, the first thing that you must do is identify your golf cart. For this, check the user manual to find the serial number or VIN.
Once you’ve found the VIN or serial number, send it to a nearby kiosk to track down the year and model of your golf cart.
This information will be necessary to identify the specific clutch puller for your golf cart. Remember, clutch removal is merely impossible unless you select the right clutch puller.
Step 3: Detach The Drive Belt
The primary drive (60% ability) clutch is mounted directly above the engine crankshaft. To completely remove the drive clutch, you must first remove the drive belt.
For this, you have to pull up the engine cover of the golf cart to get to the drive belt under the hood. In general, it’s easily visible and readily identifiable.
Unscrew the drive belt tension bolt from the front pulley. For this, you have to use an open-end wrench.
Once done, you can detach the drive belt. When it is fully in rest, it should be loose enough, so you can effortlessly work it over the drive clutch.
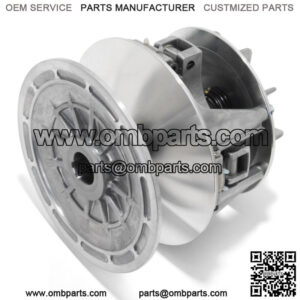
Step 4: Remove The Clutch Drive
As you’ve removed the belt from the drive clutch, you can continue to the drive clutch disengage command. This process is the lengthiest and most critical, so we broke it down as follows:
- Here, you have to disengage the drive clutch from the crankshaft by pulling the thread on which the bolt screws out and replacing it with the thread that resides in the crankshaft referred to as the anchor.
- Once removed, you can see that the clutch hole is not as big a step-down as the bolt head. This is because the retainer bolt is threaded into the crankshaft end instead of the clutch switch itself.
- You will discover that there are also additional threads inside the clutch. In some cases, modern golf carts come with a tapered shaft on the crankshaft end. This helps to make sure the clutch has a snug fit to the shaft and that it won’t come off.
- Removing the clutch afterward will be challenging because it remains fully clamped around the crankshaft. After purchasing a particular clutch puller that matches the clutch hole on your golf cart, thread it into the hole.
- Use the air gun to turn the puller inward at a high speed to ensure that the clutch puller can attach to the crankshaft. When the puller touches the crankshaft, it will generate enough pressure to pop off the drive clutch’s tapered fit.
“Keyword”
“how to remove golf cart clutch”
“how to clean golf cart clutch”
“how to remove primary clutch on yamaha golf cart”